

Add / Edit an Account Template
To add a new account template, click the button on the overview page:

To edit an existing account template, click on the corresponding icon ![]() .
.
This takes you to the input mask page, where you can determine the features of the account template. Fill in the displayed form accordingly.
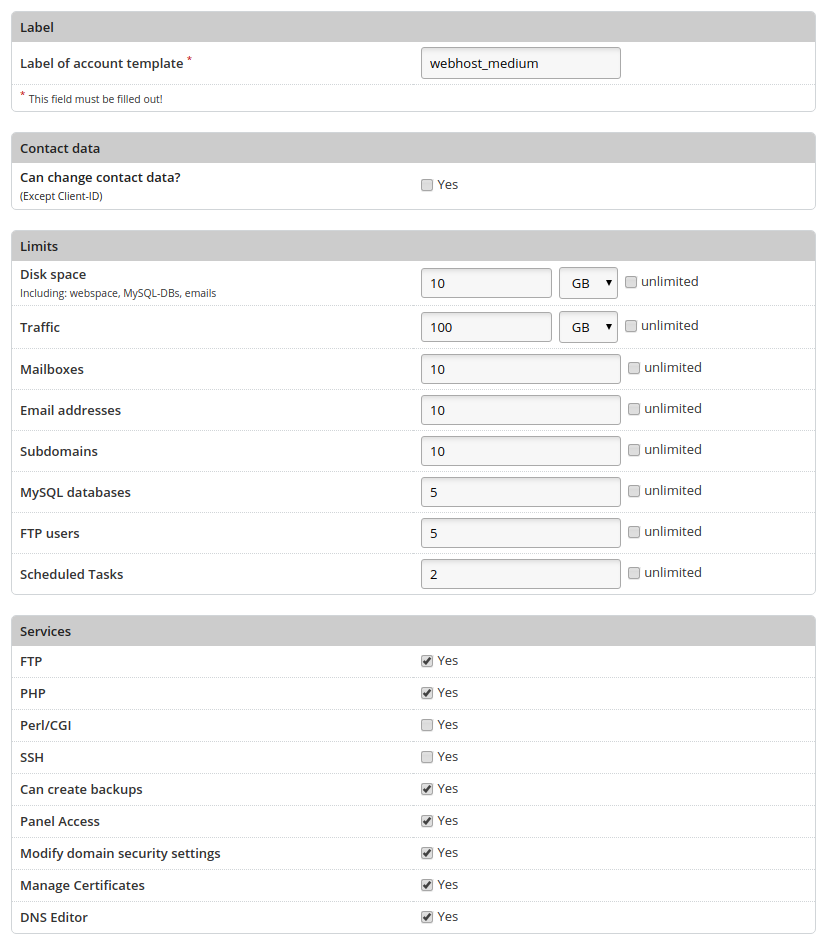
Label
|
Label of account template |
Specify a name for the template. |
Contact data
|
Can change contact data? |
Specify whether the user is allowed to change its contact details. |
Limits
|
Disk space |
Specify the maximum amount of disk space that can be used. Web space, mailboxes and databases are all sumed up in terms of available disk space. |
|
Traffic |
Specify the limit for the user's traffic. HTTP(S), SMTP, POP3(S)/IMAP(S) and FTP(S) are taken into account when calculating traffic. |
|
Mailboxes |
Specify the number of email accounts that can be created. |
|
Email addresses |
Specify the number of email addresses that can be generated. Email addresses include email accounts as well as forwarding and aliases. The number of possible email addresses should therefore always be greater than or equal to the number of email accounts. |
|
Subdomains |
Specify the number of subdomains that can be created. |
|
MySQL databases |
Specify the number of MySQL databases that can be created. |
|
FTP users |
Specify the number of FTP users that can be created additionally. |
|
Schedules tasks |
Specify how many periodically executed tasks (cron jobs) the user is allowed to create. |
Services
|
FTP |
Specify if the user can log in via FTP. |
|
PHP |
Specify whether the user can use PHP for his web pages. |
|
Perl/CGI |
Specify whether the user can run Perl or CGI scripts. Files ending with .fcgi are executed via FastCGI. |
|
SSH |
Specify whether the user is to have access to the server's console via Secure Shell. |
|
Can create backups |
If activated, the user can use the backup function. Otherwise, the corresponding menu item is hidden. |
|
Panel access |
If activated, the user can log into the KeyHelp interface. A user login via the icon |
|
Modify domain security settings |
The user can modify SSL/TLS settings of his domains, e.g. activate SSL/TLS, HSTS, Let's Encrypt. |
|
Manage certificates |
The user has access to the certificate management, with which he can upload and administer his own certificates. |
|
DNS editor |
If activated, the user can manage the DNS settings of his domains himself. |
PHP-Einstellungen
|
memory_limit |
Sets the maximum amount of RAM (in bytes) that a script is allowed to use. To set no memory limit, enter -1. Use the following abbreviations for byte values: K (kilo), M (mega), G (giga). Example: 64M. |
|
max_execution_time |
Specifies the maximum time in seconds that a script can run before execution is stopped. |
|
post_max_size |
Specifies the maximum size of the data (in bytes) that can be sent with the POST method. The value should be greater than "upload_max_filesize" and less than "memory_limit". Use the following abbreviations for byte values: K (kilo), M (mega), G (giga). Example: 64M. |
|
upload_max_filesize |
Specifies the maximum size (in bytes) of an uploaded file. Use the following abbreviations for byte values: K (kilo), M (mega), G (giga). Example: 64M. |
|
open_basedir |
Limits the files opened by PHP to a specific folder including its subfolders. The placeholder ##DOCROOT## can be used and is automatically filled with the user's document root directory. Multiple directories are separated by a colon. Example: /web1/files/:/web1/www/ |
|
sendmail_from |
Specify the mail address to be used by PHP scripts as sender address. Only relevant if you have problems with rejected e-mails due to an incorrect sender address (SPF check). |
|
disable_functions |
Enables disabling internal PHP functions for security reasons. The functions are passed as a comma-separated list of function names. |
|
Additional PHP settings |
Here you can make additional PHP settings. Use the same syntax that you would use in a php.ini. Example: date.timezone = Europe/ Berlin |
PHP-FPM Settings
|
pm |
Specifies how the process manager manages the number of child processes. static - The number of child processes is fixed (pm.max_children). ondemand - The child processes are started as soon as they are needed. dynamic - Combination of static and ondemand . The number of running child processes is dynamic, at the beginning pm.start_servers processes are started. |
|
pm.max_children |
The maximum number of child processes that will be started. |
|
pm.max_requests |
The number of requests that a child process executes before it restarts. For an unlimited number of requests, enter the value 0. |
|
pm.min_spare_servers |
The desired minimum number of processes. Only necessary if the pm setting is set to dynamic . |
|
pm.max_spare_servers |
The desired maximum number of processes. Only necessary if the pm setting is set to dynamic . |
|
Enable PHP-FPM status page |
You can use the FPM status page to display details about the user's FPM pool. Activate the checkbox to activate the status page. You can restrict access to a specific IP. Enter them in the form field. If you do not want a restriction, leave the field blank. You reach the ping/status page via the URLs: http(s)://<DOMAIN_NAME>/fpm-ping http(s)://<DOMAIN_NAME>/fpm-status |
To apply the settings you have made, click on the button:
